Elf Slipper Tutorial

 Check out this great tutorial at Maya Made for really cute Elf slippers. She does a great job explaining every step and the results are just too cute.
Pictures property of Maya Made

Check out this great tutorial at Maya Made for really cute Elf slippers. She does a great job explaining every step and the results are just too cute.
Pictures property of Maya Made
There is still time to make one of these adorable dolls for your favorite little person. A handmade gift is a gift from the heart.

Arlette at Polka Dot Pineapple makes the most beautiful pin cushions and other goodies. She sells these at craft shows. She is kind enough to put a tutorial for an adorable pin cushion on her blog. They are so cute and would make nice stocking stuffers for your favorite seamstress.
Picture property of Arlette at Polka Dot Pineapple
I haven't fallen off the face of the Earth. I've been canning, freezing and dehydrating the last of the garden and produce that friends have been kind enough to give me. More is on the way today! I'll have pictures and a few recipes to share in a few days.
Meanwhile, here is a great freebie I found while surfing. Wee Wonderfuls is a very cool blog. Hillary is giving away a pattern for Christmas stockings that are adorable. So check it out. 
Photo is property of Hillary at Wee Wonderfuls.
 Thinking green and trying to live green is on everyone's mind these days. It really makes sense not only for our environment but for our pocket books as well. Every where you look stores are selling the latest, newest, good for the environment goodie. Do we really need to buy more? Wouldn't it be smarter to use what we already have?
My grandparents were some of the most frugal people I have ever known. They were green when green wasn't cool. They recycled everything that could be recycled. They did it not with the idea of saving the environment but with the goal of not being wasteful. Use it up, wear it out, make it do or do without. Nothing was too small.
My grandfather took the time to straighten bent nails from projects and reused them. My grandmother saved scraps for quilts and string from feed bags. She even taught me the fine art of dumpster diving when I helped her and her sister in law collect fabric from the place the local shirt factory dumped their scraps. I still have quilts made from those scraps. When I wanted drawing paper it was most often the blank insides of a junk mail envelope. I wasn't going to be allowed to draw on school paper that they had paid good money for!
Even with all the saving their home was never cluttered because they used the things they saved. I grew up watching that and they set a great example to follow.
Today living green is what is fashionable. I wonder how Grannie and Pa Pa would feel about being so cool? That makes me chuckle! I think my grandparents would think it funny too.
While surfing I found a great little project for using those mesh vegetable bags, and this one which is another use for those junk mail envelopes. Both are by Girl on the Rocks and they are frugal and green. Are you going to save the world or save a bazillion dollars? Nope. But it might get you to thinking about other things you can do and if we all make a few changes...who knows.
I'm always looking for ways to keep things out of the landfill. When I saw this brilliant idea from Girl on the Rocks to redesign and reuse all those security envelopes that come in the mail I thought I would share it. It has set my wheels turning to see what I can come up with. Hmmmmmm....
 I had fun this weekend making a gift for a baby shower. I used this pattern and changed it up a bit for the rosebud booties. I made mine from flannel instead of felt and I lined them. I used my own pattern to make the matching bib. The white felt booties are an adaptation of this pattern. Here you will find the directions. I did some adjusting to the size, changed the back of the shoe and made mine from felt instead of flannel, and did button hole stitching around the edges to finish. I had forgotten how fun it is to make things for babies.
 It isn't always easy to get kids interested in sitting down and looking through family genealogy and I think it is important that they know something about their family history. I thought it would be interesting to include ornaments for these family members in away that would be fun and educational.
I did some brainstorming and came up with this idea after watching a scrap booking show where they made gift cards using movable elements.
I bought this box of tags at a yard sale for 50 cents. I wasn't sure what I would do with them. I knew that gift tags were a real possibility but I wasn't sure about any other uses. I just knew that there were possibilities and the price was too good to pass up.

Using paint, glitter, beads, jewels and Mod Podge from my supplies and photos I printed out I created these tags that I am using as ornaments on my tree.
 The backs are equally decorated and include names and relationship. I am a glitter kind of girl so I brushed each with a coat of Sparkle glaze after the Mod Podge and they look great on the tree. My favorite it the "shaker" ornament.
 I used the plastic cover from a pack of safety pins for the cover. I put beads and a little gold glitter inside and glued it to the decorated tag. The beads and glitter add some fun and interest. The possibilities are endless as to what you could add, any small item would work.
These would also make great gift tags. You could use pictures of individuals instead of names and they could hang them on the tree after they open their gifts.
Pics: The middle picture: Me with my middle sister at my grandparents home (Yes Sonya, I'm making one for you too!), My mom at 18 (Wasn't she pretty?) , My husband is the little boy on both tags (What a cutie!) , and my dad's parents.
 I've had these silhouettes of my kids displayed on a shelf for years, just waiting until I could find the perfect frames to put them in. I finally did! I got both these frames at the thrift store for $2 each! I didn't go to the expense of getting a mat cut for them. I took black acid free paper, scrapbooking actually, and placed the pics on top of it with pieces of archival tape. When they were put in the frames you can hardly tell that they aren't framed.
I am really wanting the warm weather back and am feeling the need for spring cleaning and rearranging. I picked up some silk African Violets at the wholesale florist, put them in regular terra cota pots and sat them in my dining room window; then I hung my new pictures. It cheered me up and brought a little spring in, even if it is still pretty cool outside. Now I just need the sun to shine.
I've had these silhouettes of my kids displayed on a shelf for years, just waiting until I could find the perfect frames to put them in. I finally did! I got both these frames at the thrift store for $2 each! I didn't go to the expense of getting a mat cut for them. I took black acid free paper, scrapbooking actually, and placed the pics on top of it with pieces of archival tape. When they were put in the frames you can hardly tell that they aren't framed.
I am really wanting the warm weather back and am feeling the need for spring cleaning and rearranging. I picked up some silk African Violets at the wholesale florist, put them in regular terra cota pots and sat them in my dining room window; then I hung my new pictures. It cheered me up and brought a little spring in, even if it is still pretty cool outside. Now I just need the sun to shine.


The best thing about Trash to Treasure, to me, is that something doesn't have to be a permanent fixture in your home. Items that are cheap or free can be used until you can afford to replace them. You are guilt free when you pass the item on to it's new home.
I picked up this dresser at a yard sale. I needed a large table for my side of our bed because I have stuff. Lots of stuff people! Well, mostly books. I usually have 3 or 4 books in the process of being read. I also need drawers. I prefer small items to be contained because I have a tendency to be a clutterbug and I need to have somewhere to keep it all. Neatly.
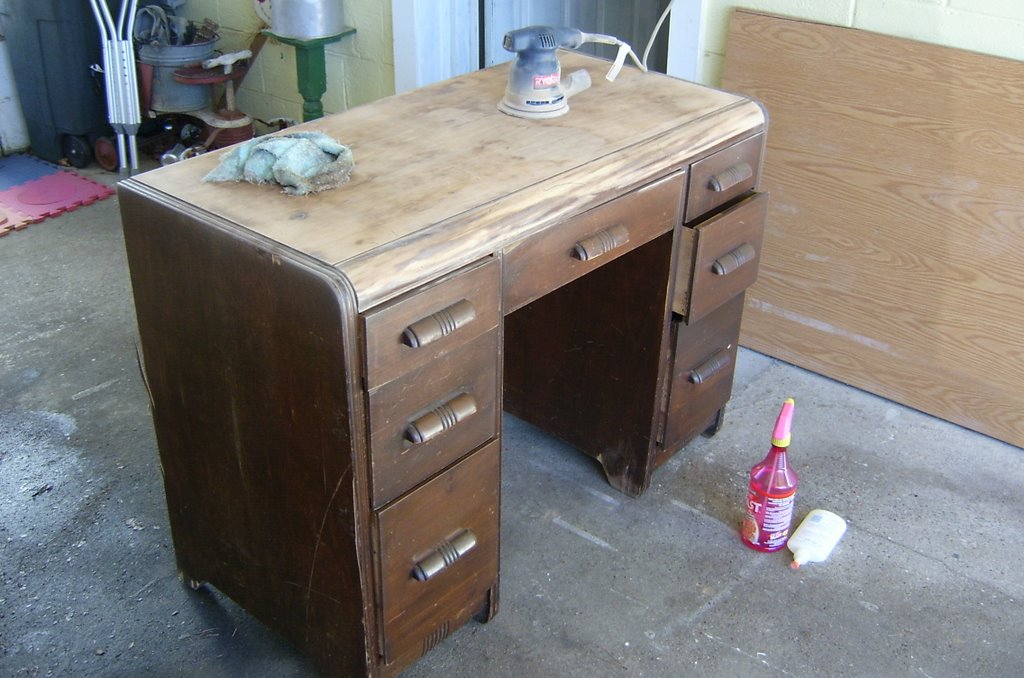 After sanding and gluing down some loose veneer I decided to paint it and stamp the top. I used regular craft paint for the base and the stamping. I finished it off with a coat of clear spray paint from Wal Mart.
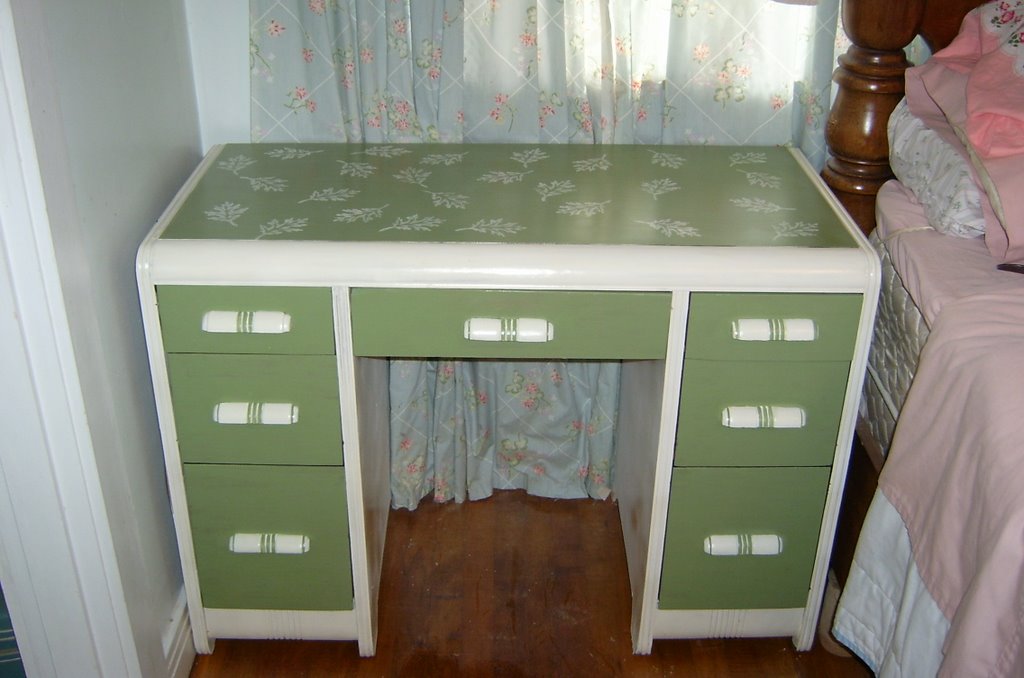 Perfect side table for the perfect price of $8 total. I'll keep this until we get around to remodeling our bedroom and get new furniture.
I love to decorate my home. I love doing it with spending as little cash as possible even better. I think even if money were no object I would still enjoy the challenge of taking something that seems destined for the trash and turning it into something useful and hopefully, beautiful. Not to mention the value of keeping something out of the landfill. My current project is a lamp picked up at Goodwill that I am taking apart and converting to a candle holder...I hope!
One of my favorite projects was this stool I picked up off of Freecycle.
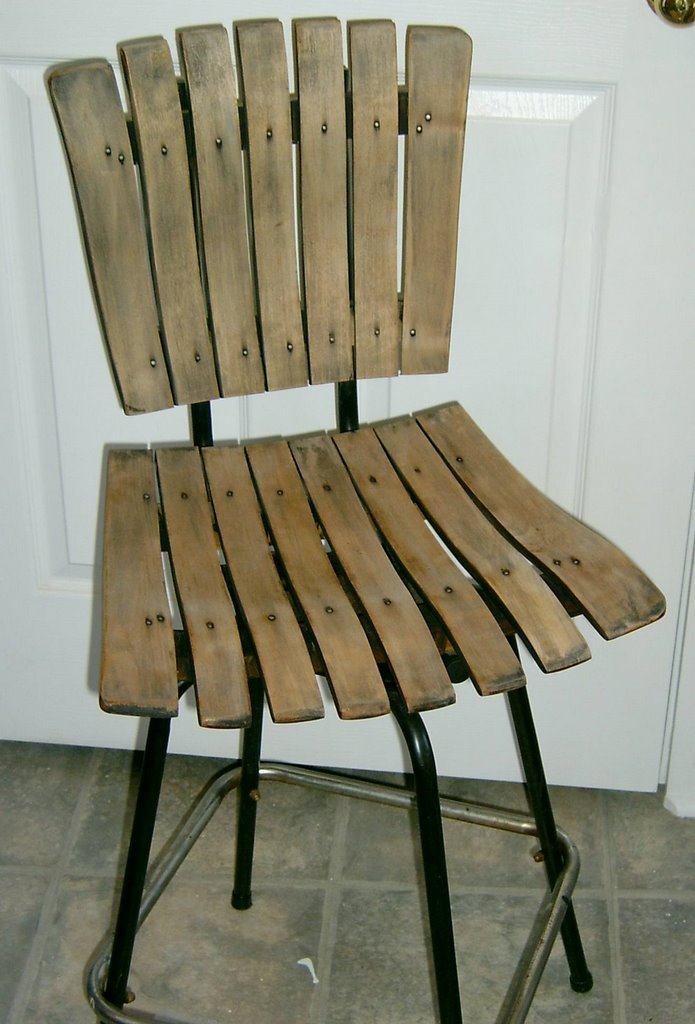 Sturdy and comfortable and perfect height for my work area. I decided to go with a Mary Englebreit look. I enjoy her artwork and wanted something cheerful but not overbearing.
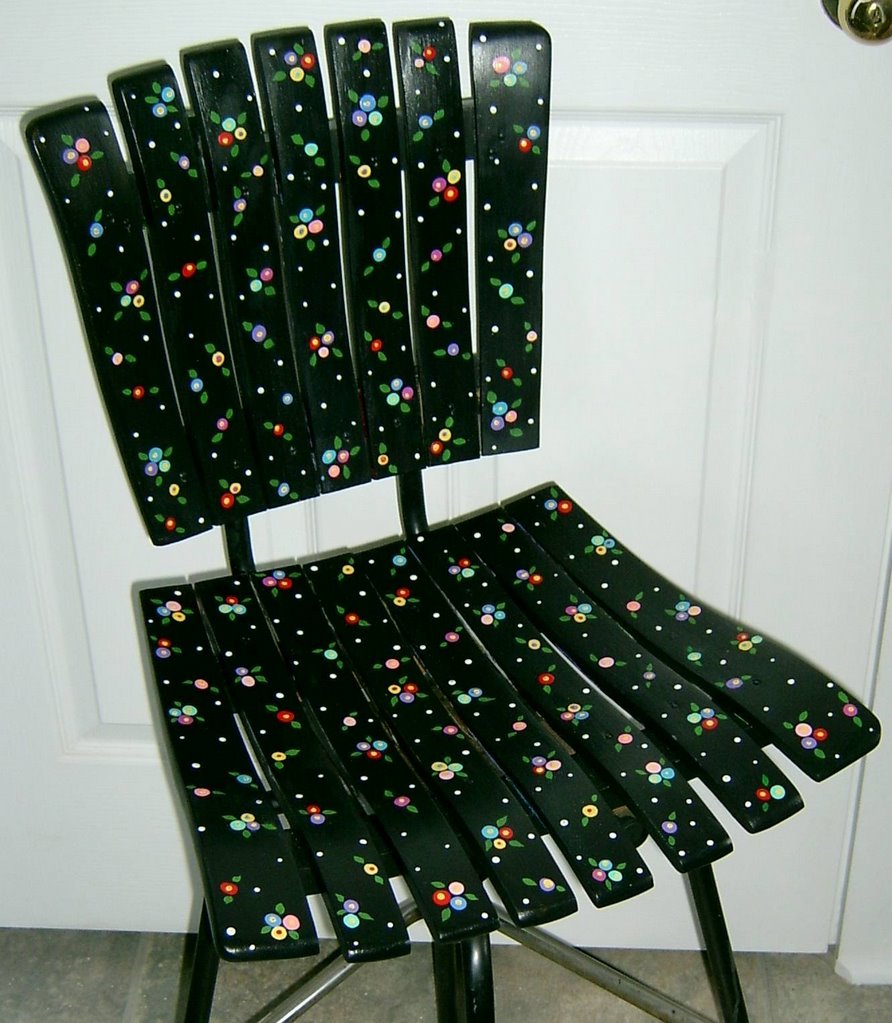
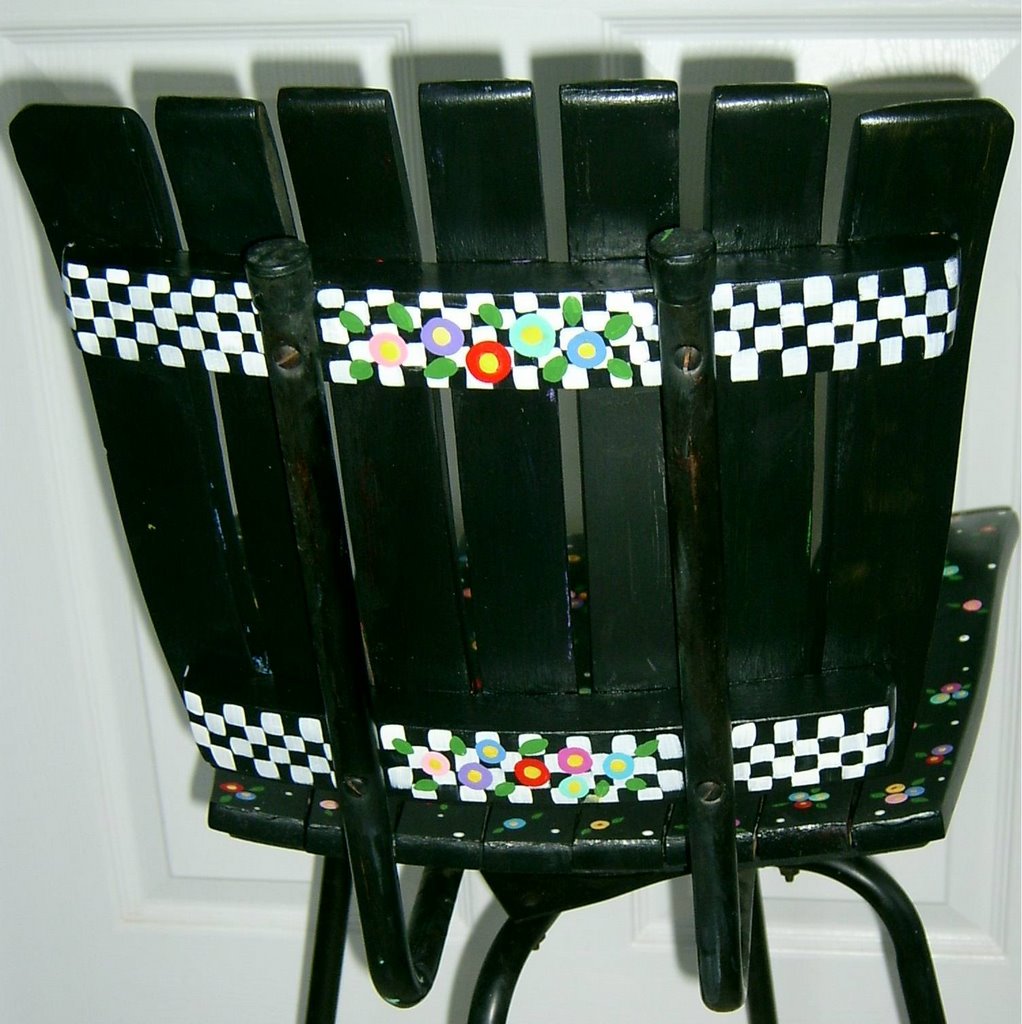 Seating problem solved. Now all I have to do is get everything organized in my work area and I'm all set. I think that will take a whole lot more than sandpaper and some paint!
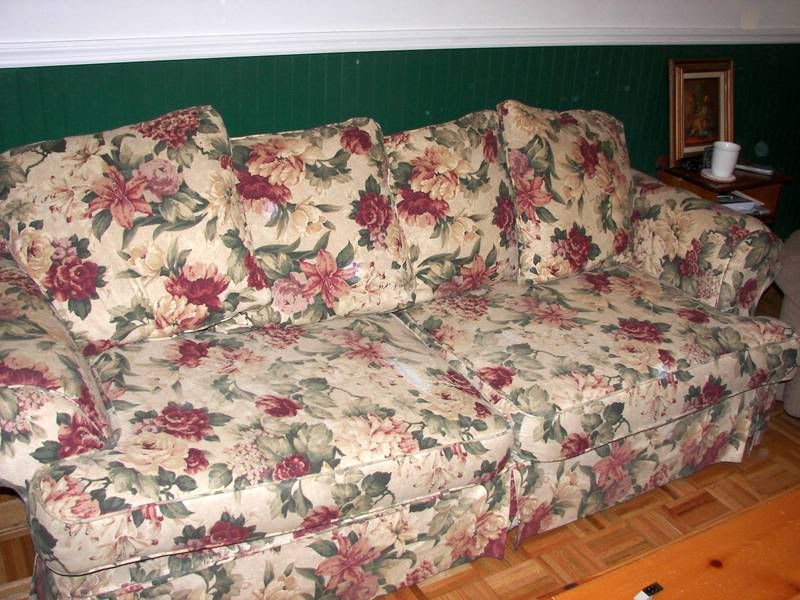
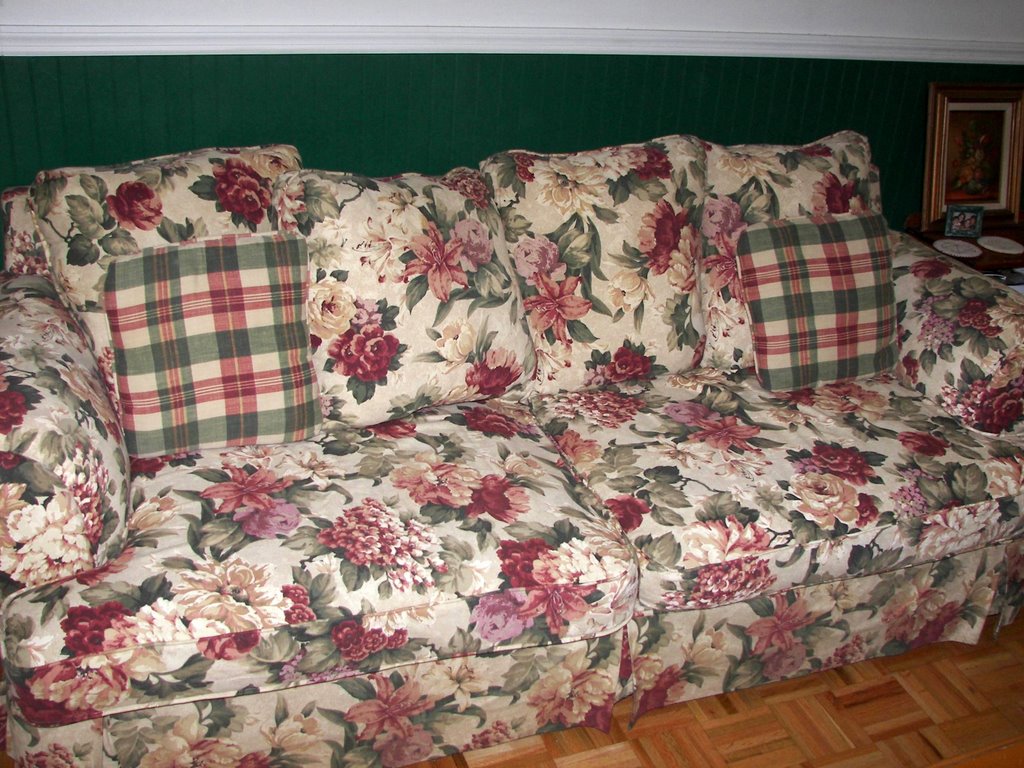
The temperature dropped below 85 and the Fall Fix Up Bug bit us. We have been patching, painting, sewing, mulching and planting. The most satisfying project by far for me is my "This Old Couch" fix up. As you can tell in the before picture it was seriously in need of a make over. Our dearly departed dog, Toby, did a number on the cushions. It was dirty, torn and just all around objectionable. 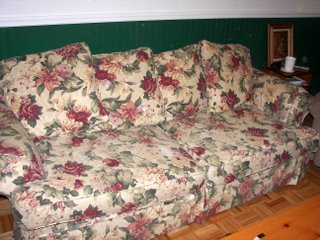 http://img.photobucket.com/albums/v309/Scatrodee/before.jpg
I knew I couldn't afford a new sofa, and if I messed it up really bad I would just have to invest in slipcovers. So, with nothing much to lose, my daughter Laura and I set out to make it over. We found the matching material for a total of $20. Laura used her imprssive sewing skills and made new covers for the cushions. I set about recovering the arms and washing and restuffing the back pillows. Now you don't sink into the back of the sofa, it actually supports you. The pictures don't do it justice. I am so happy how it turned out, especially considering the fact that neither of us had never tried to recover anything before. I remember now why I picked it in the first place. I love the colors.
http://img.photobucket.com/albums/v309/Scatrodee/before.jpg
I knew I couldn't afford a new sofa, and if I messed it up really bad I would just have to invest in slipcovers. So, with nothing much to lose, my daughter Laura and I set out to make it over. We found the matching material for a total of $20. Laura used her imprssive sewing skills and made new covers for the cushions. I set about recovering the arms and washing and restuffing the back pillows. Now you don't sink into the back of the sofa, it actually supports you. The pictures don't do it justice. I am so happy how it turned out, especially considering the fact that neither of us had never tried to recover anything before. I remember now why I picked it in the first place. I love the colors.
 click to enlarge
So I have a "new" sofa for around $35 total plus labor. I'm happy and Randy is VERY happy! LOL. Hopefully it will last at least another 10 or more years. Truly a frugal makeover.
click to enlarge
So I have a "new" sofa for around $35 total plus labor. I'm happy and Randy is VERY happy! LOL. Hopefully it will last at least another 10 or more years. Truly a frugal makeover.


Come back soon.